Sonntag, 15. Dezember 2013

16.12 Papierstern /3D Paper Star


Hallo, Ihr Lieben!
In unserem neuen Miniforum findet gerade ein Adventskalender statt und heute bin ich an der Reihe.

Material:
(Scrapbooking-)Papier, Schere, Lineal, Cutter, Kleber, Nadel und eine weiche Unterlage, Beleuchtung


Das ist die Schablone. Die könnt Ihr entweder so ausdrucken und nach Wunsch bemalen: oder ausdrucken und als Schablone auf gemustertem Papier verwenden ...oder direkt auf die Rückseite von Scrapbooking-Papier drucken.
Für einen etwa 4cm breiten Stern die Vorlage auf 9x13cm drucken. Generell ist der Stern mit etwas festerem Papier leichter in Form zu bringen.


Ich habe meinen Stern einfach auf normalem Druckerpapier ausgedruckt und als Schablone verwendet. Die Linien werden mit einem Cutter vorsichtig nachgezogen, damit das Falten leichter geht. Die rot gezeichneten Linien werden nach oben gefaltet, die blauen nach unten.


Hier ist der Stern schon vorgefalzt, damit er sich später leichter in Form bringen lässt.
Glatt auf eine weiche Unterlage (Moosgummi, Bierdeckel) legen und mit einer Nadel Löcher einstechen.


So sollte es dann aussehen..und natürlich braucht Ihr zwei Sternhälften :D


Die Sterne falten, Klebeklappen umklappen und mit Kleber bestreichen


Hier kommt nun die Beleuchtung dazu. Ich verwende batteriebetriebene LEDs von
true2scale. Das Kabel zwischen die beiden Hälften legen und die Sterne zusammen kleben.


Fertig isser :D
Bei Unklarheiten bitte fragen und nun viel Spaß beim Nachbasteln!

Sandra

Dienstag, 3. September 2013

Shabby Chic Garden Shed


Hello!

Some nice people keep reminding me to do a blog post so here it is :-)
Last year Kaisa organised an international Birthday swap and with a delay of 10 months I was finally able to send my last gift to dear Gillian who never lost a bad word about my delay. Thanks, Gill!!!

I made  her a shabby chic garden shed but it could probably also be used as a beach hut :-)


It is made of coasters and some coffee stirrers from a friendly fast food restaurant :D


I made some this and thats for the inside but there´s still free space for Gill to decorate with her own ideas.


The watering can is made of paper and a straw from a kid´s drink and painted with a coat of my daughter´s VERY pink nail polish :-)
For the rubber boots I used Monika´s tutorial (and some swear words!)


And another tutorial: the clematis is made with Annie´s tutorial.


Although my trust in mail service is not so high Gill told me that everything arrived safely in Spain :-)

And here - tadaaa! - are two fluffy reasons who are keeping me from blogging:


This is little Hermine (named after Harry Potter´s clever friend)...


...and his fluffiness Pimpf.
Before they came there were some more flowers on my window sills (gone forever!), but how could I be angry on them !!?

My son is going to have his first day in school next week and my husband and I are probably more excited than him! (Where did time go?) So life is changing a bit with doing homework with him and learning but nevertheless I hope to be a bit quicker with my next post.

Thanks to those how come by and leave a comment, of course I read them all and they mean a lot to me!

Hugs, Sandra

Sonntag, 26. Mai 2013

Maggie Applewhite


Hello Bloggers!

Thanks to all of you who have been wondering if I am doing well because of my long absence! I´m fine, real life just keeps me quite busy. Two weeks ago we spent a week vacation on the Lago di Garda and we had a wonderful time there and...my energy is back!

This weekend I´ve been playing around with my witches shop "Miranda´s Magical Seedlings". I paper-backed the shelf for the potions, finally made a broom...


..which is an absolute MUST HAVE for every decent witch, played around with the furniture...


...and  bits and pieces...


...and made Whoo-Hoo-Apples (very delicious in witchy apple pies AND 100% organic!)..


...to be more attractive for our magical customers. Here´s the first buyer, dear witch 
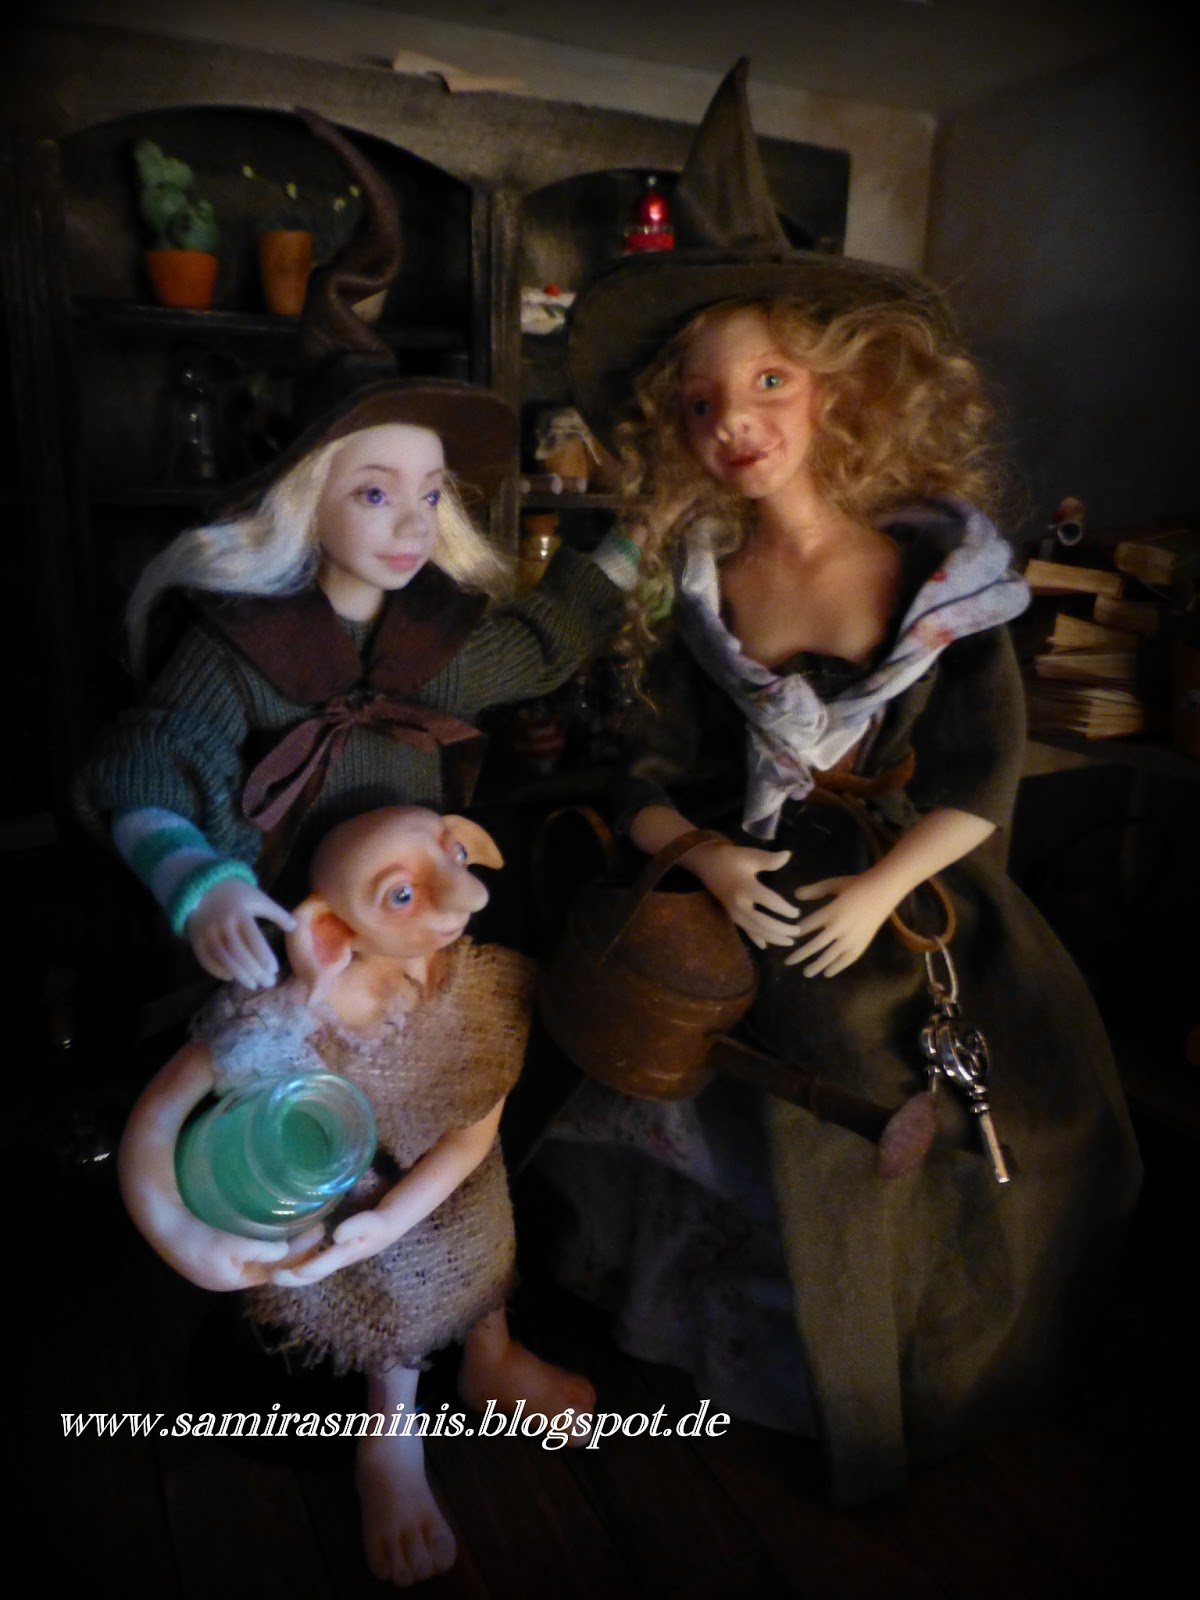
Maggie Applewhite who lives in the neighborhood.


Don´t worry, she is a really good witch. Most of the time :D
I am so happy how she turned out (more "alive" than my other dolls), although she was really, really ugly until the moment she had her hair and hat on and I almost threw her away :-)

But now I also want to introduce you to someone else:


PIMPF

This little miniature is going to live with us in a few weeks :-))))))
Isn´t he CUTE!!!?

Bye for now,
Sandra


Dienstag, 26. Februar 2013

Sweet Dreams


Hello there!
Who would have thought that: the room is almost finished :-) But first, some of you made compliments for the wallpaper. It is "Rose Floral - cream (WAL 0894) and I bought it from artofmini.com. When you look through their wallpapers section, you will find this paper on page 10.
Sunday I had unexpectedly some time for my own and I used it for painting. I did a lot of drawings when I was in my teenage days but nothing of that kind within the last 20 years (pffffff...!!!) but then it was so much fun to paint the "art" for my mini-bedroom by myself! I guess, I will make some more :-)
It is above on the left side.


From a little distance it looks really good :-)))))
But that was not all. Ilona encouraged me to paint the floor white and I did it. I also glued the same wallpaper behind the open door and made a dish shelf for the wall, so that it´s not complete empty but leaves some room for the dollhouse people to move (but only if they are size 0).
For the ceiling I used strips of thin cardboard that I painted and then just some wooden strips from the craft store as timbers.


In the evening...


And at daylight:


Some more decoration is needed, but it is already quite cozy, isn´t it?  Maybe I should tell
my wonderful husband that this is the look I want for our bedroom ...haha!
Is the style of your dollhouse similar to your real home? That would be interesting to know!

Have a wonderful week!
Sandra


Samstag, 23. Februar 2013

Progress in the Ballerina´s House

Hello Everybody!
The lazy blogger is back with a little progress in the ballerina´s house. A friend of mine is visiting us tomorrow and as she´s always interested in my houses I want to be able to show her at least one half-finished room.

I am adoring one very romantic room in Lea Frisoni´s book for ages and now I want to try to make my own romantic mini-room. So weeks ago I started with making new walls with panelling with a lot of cardboard.
The swags are embossed paper I found in a store. Very useful :-)


I still have to make a decision about the color of the floor (mayby paint them white?), then the ceiling....but not today :-)...


The little girl in the frame is my stepmother, it is so nice to have her here in mini, too! 


 These two guys are the result of my attempts in needlefelting "vintage style" bears, wonderful job when hubby´s watching football on TV ...


Today I found a kit for making luggage which I had completely forgotten about. It is from Hilda Burden and I think I got it from ebay uk and it was very easy to make. On the suitcases I put a little Het Loo-dollshouse from Volker Arnold. I made a mistake when buying it as I actually wanted a larger one. But then it was also
easy to built and there are even some trees in different sizes and a few horses with this kit....and I love it :-)
(The lovely dress is made by Kaisa)


That´s all for today. I want to thank you for your comments on my last post (Miranda is very amused, too!) and  also "Welcome!!!" to my new followers! 

Hugs, Sandra


Sonntag, 6. Januar 2013

Happy Together!


Hello!
So much time has passed since my last post! Now I really hope that you enjoyed a very happy Christmas and wish you a Happy 2013!  The last year seems to have been a difficult year for many of us so I hope that 2013 will have a lot of positive surprises for us!

Quite a while ago, actually in the night of Helloween, it was finally time for cutting the mandrakes for a very special beer. Our houseelf Albert is a bit soft-hearted, so for this special job we had to organize the help of another elf, Alfie. 


Yeah, and Alfie didn´t hesitate and made a quick job....and the mandrakes soon were cut in little bits and came into a bottle, along with some spices and other, secret ingredients (Better, you Muggles don´t know too much of it!)...after that the bottle was corked and had to thicken over some weeks.


Albert was sooooo glad! But also worried: would it work? Could Miranda finally be human again????
Last night was THE night. Time to find out....


YES!!!!
She is back :-)


Still, Miranda needs some time to recover from her long existence as an owl...and the urgent desire to eat some mice....

...but Albert and Miranda, they are soooo happy together!

Have a happy week!
Sandra